Kale, chickpea and sweet potato cakes 

Kale, chickpea and sweet potato cakes 

I last posted a recipe in January and effectively it feels like a lifetime ago. The last three months have flown out of the window, and although loads has been happening, I feel like I’ve gotten nothing done! Do you think we can press the reset button and just go back to the 1st of January (without the hangover)  

This recipe was a quick one, developed over maybe 20 minutes using what I had in my fridge and pantry. That’s the best type of cooking, I believe, because you are able to experiment and create, which is always a good thing. 

Handle these babies with care, as they are fairly fragile, but pack power, crunch, and loads of flavor!  

Kale, chickpea and sweet potato cakes


  • 1 large sweet potato, roasted in the oven until soft, remove skin 
  • 3 big leaves of curly kale, stalks removed 
  • 1 cup of chickpeas 
  • 2 cloves of garlic, minced 
  • 1 small chilli, chop finely 
  • 1 cup of peas (I blanched them in vegetable stock to just soften them) 
  • 3 purple spring onions 
  • A hand full of soft herbs, I used coriander and basil 
  • 1 cup of Panko crumbs / or normal bread crumbs 
  • 1 cup of white sesame seeds 

Process all the ingredients in a food processor, besides the breadcrumbs 

Season well with salt and pepper 

Remove from the food processor and add to a bowl. 

Add half the the breadcrumbs, you want a slightly firm, but not dense mixture, basically able to shaped but not too stiff. 

If you need to add more breadcrumbs, do so. 

Shape them as you big or small as you want, I got about 12 mini cakes 

Coat in sesame seeds 

Place on a greased tray and bake in an oven on 200C until they are slightly golden 

It’s a fragile cake, so handle with care 


❤️

Deliciously delightful 

Deliciously delightful 

We are kicking 2016 into gear, and tying to make changes, stick to our resolutions and follow through with working out, eating healthier, and trying to leave all of our 2015 mistakes in 2015. 

#NoMeatMonday is a hashtag that you’ve probably seen around, on Instagram or Twitter, and even though I cater mainly for a vegetarian, I try to adapt my eating pattern to being strictly “meat free” one day a week, sorry, but some Monday’s don’t always work for me….because, life. 


I am constantly on the look out for inspiration and adaptations with recipes that are vegetarian. These GORGEOUS and tasty Veggie Burgers are filled with everything that’s good for you. Serve them like I have, wrapped in spinach or on fresh burger buns. They can also be served as a side to grilled fish or made smaller and served with a fresh rocket salad, with loads of roasted corn and fresh avocado. I actually had mine with salmon sashimi and a corn and avocado salsa, with loads of sriracha and olive oil, it was DELICIOUS! 


The recipe is simple enough and you can adapt the pulses to any that you have in your pantry. I used chickpeas, but you can use black beans or lentils. The most amazing aspect of this recipe is that you can grill them on the bbq, because they are firm patties and serve them straight off, onto fresh buns with loads of fresh toppings. 


Veggie Burgers

  • Time: 10 mins
  • Difficulty: Easy
  • Print


  • 1 cup of cooked brown rice 
  • 1 cup of raw almonds 
  • 1/2 white onion, chopped 
  • 1 tsp, each of, chilli powder and smoked paprika 
  • 1 TBSP of coconut sugar or brown sugar 
  • 1 1/2 cups of cooked chickpeas 
  • 1/3 cup of Panko crumbs 
  • 4 TBSP of vegetarian BBQ sauce 
  • Salt and pepper to season 
  • Coconut oil to fry 
  1. Heat a pan over medium heat. Once hot, add the almonds and leave to toast, tossing occasionally to prevent burning. You want a deep golden color on them. 
  2. Once you have them at the perfect color, transfer them to an oven tray to cool. 
  3. In the same pan, add a splash of coconut oil, and the chopped onion. Cook the onions until they are soft and translucent. Season then with salt and pepper. Remove from heat and place to one side. 
  4. Once the almonds are cool, add then to a food processor with the spices, coconut sugar, and blend until you have a fine meal. 
  5. To a large mixing bowl, add the rice, the chickpeas, almond mix, Panko crumbs, BBQ sauce, and mix with a spoon. You can use your hands and mash the chickpeas slightly, while you combine all the ingredients. 
  6. This mix gives you 6 burger patties, so divide the mixture and then shape the patties, keeping your hands slightly damp while doing so.  
  7. Heat 2 tablespoons of coconut oil in a large frying pan, over a medium heat and place your patties in the heated oil, frying them until golden brown on each side. 
  8. I “seal” them in the pan to give them color and then heat them in a preheated oven of 200C before I serve them. 


❤️🍴

Cauliflower falafels

Cauliflower falafels

Ok guys. You know I love using cauliflower, in as much as I can. From sushi bowls, to egg fried “rice” to pizza, to fritters.

I did this recipe the other day, as I needed to make a “packed” lunch for my vegetarian, as she was on the road, and only after did I then have to figure out what I actually put in them, but don’t worry, I remembered, tried the recipe again, and all is well in the world of Food by Jill. 🙂

Falafels, as you might know, are deep fried balls that are made from chickpeas or fava beans – or even both, its a Middle Eastern favorite, served with fresh pita breads loads of hummus or pickled vegetables – and it’s a huge part of the street food culture in this countries. Rich in protein, it’s a brilliant snack option for vegetarians, or even kids lunchboxes.

Processed with VSCOcam with c6 preset

Processed with VSCOcam with c1 preset

Processed with VSCOcam with c1 preset

Processed with VSCOcam with c6 preset

Processed with VSCOcam with c1 preset

Cauliflower Falafels

  • Servings: 4
  • Difficulty: Easy peasy
  • Print

1/2 head of Cauliflower

1 Handful of coriander

1 Handful of kale (stalks removed)

2 eggs

1 tin of chickpeas

2 teaspoons of baking powder

1/2 cup of brown rice flour

Seasonings like – ground cumin, chili, salt and pepper, paprika

Depending on your taste – go wild!

Process all of these ingredients in a food processor, until fairly smooth. Shape into little balls and deep fry until golden in coconut oil, on a medium heat.

I served these with thick cut roasted sweet potato chips, that I roasted with loads of fresh herbs, and also a pea “guacamole” –  which was 1 cup of blanched peas, to 1 large avocado – blend the two and season with salt and pepper, and the juice of 2 limes! Rich in protein and so yummy!

Green Sauce! 

Green Sauce! 


Going a tad bit crazy for this sauce. 

Well, it’s not a sauce per se, more like a thick salsa that’s not a salsa….get what I mean? Maybe I can call it a thick guacamole??? It has the magical avocado…it also has load of fresh herbs, pistachios, and some kick with jalapeños!


You can use this on ANYTHING. Nachos, fish, chicken, steak, a dipping sauce for sweet potato fries, or those awesome mozzarella sticks, use it as a dressing for a pasta salad or as an add on to a crudités platter! It’s endless!!! It’s also quick, all into a food processor and go go go!


So on a mission to always find GOOD alternates, that still taste amazing, look good and are healthier than mayonnaise, processed tomato sauce or all the other stuff that you accumulate in that side door of your fridge!

Although shelled pastachios are a bit pricey, it’s worth the splurge, and a 200g bag gives you enough nuts for at least 3 recipes. (So a good investment, as this will become a staple and an addiction)

Green Sauce

  • Servings: 6-8
  • Print

Ingredients

1 avocado

1 cup of flat leaf parsley and coriander, loosely packed – combined

1 jalapeño pepper, seeds and ribs removed

2 cloves of garlic

Juice of two limes

1/2 cup of water

1/2 cup of olive oil

2 teaspoons of salt

1/2 cup of pistachios

Method

Add all ingredients besides the pistachios, into a food processor, pulse until combined. Add the pistachios and blend.

Taste for seasoning, but it should be all good and delicious!


❤️🍴

Amazing gluten free pasta!!! 

Amazing gluten free pasta!!! 

So what happens when you can actually feel the effect that gluten has on your tummy?? 

I’m not one to jump on any quick fix diet, detox or cleanse, but I have started (after many years of eating really badly) listening to my body. You can actually do that you know!? After years of battling, I figured out that I am actually lactose intolerant, and stopped eating the wonderful creamy pastas that I always gravitated to. I also stop eating processed dairy, and stick to Parmesan, that I put in almost everything!!!

Gluten on the other hand, you can actually feel the difference after you have eaten a gluten free dish and one that is filled with gluten. Here’s the challenge…loads of restaurants offer the two options, try one then another time, try the other.

SEE!!!!!! Can you feel the difference??

So here, a quick recipe, to make a handmade pasta, that once you master, it will become a staple, and you’ll serve it at least once a week! The sauces and/or toppings, are only as limited as your imagination.

Gluten Free Pasta

  • Servings: 4 Adults
  • Difficulty: Patience is needed
  • Print

Ingredients

1 cup of brown rice flour

1/2 cup of tapioca starch

1/2 cup of buckwheat flour

Generous pinch of salt

1 handful of basil

3 eggs

1 tbsp of water

  • Place the eggs into a blender, with the basil, and blitz until the basil is fine.
  • Transfer to a bowl, and add the water, and salt. Mix well.
  • Add the dry ingredients and mix well, until all incorporated. Transfer to a floured surface and knead for about 5 minutes.
  • If you have made normal pasta before, you will not that it’s not as stretchy due to the lack of gluten. Wrap the kneaded ball in plastic wrap. Leave to rest for 30 minutes.
  • Divide into quarters, keep them covered and only take out the piece that you are going to roll out.
  • Take one portion, keep your surface floured, and roll out, to as thin as you can with a rolling pin.
  •  Carefully cut to the pieces that you need, lasagne, or thick tagliatelle.
  • Transfer to a flat container and leave to rest to one side
  • Boil a pot of water as you would normally, add some olive oil and salt, and semi cook the pasta for 2 minutes, and then place it into iced cold water.
  • Once you have figured out your sauce, toss your semi cooked pasta through your sauce. This will help thicken your sauce and your pasta will take on all that yummy flavor! If you making lasagne, layer it as you would normal pasta and bake!


Pearled Barley, Pea and Mushroom Cakes

Pearled Barley, Pea and Mushroom Cakes

Processed with VSCOcam with c6 preset

Did anyone else in the Southern Hemisphere notice that its winter? This major onslaught of cold weather that came through overnight, especially here in Johannesburg! It went from Hero to Zero in a few moments!  As I have mentioned before, winter brings with it an entire amount of weird emotions and strange eating patterns. We tend to comfort eat, because its so cold, and the food we do flock to is normally the heavy, carb laden, thick stewy dishes. I AM NOT COMPLAINING! As always I try to figure out “alternates”. Ways to still eat “comfort” food without it being full of processed products and heavy on the stomach. One of my favorite products to work with is barley. I love the chewy texture, and it is Low-Gi, so it keeps you fuller for longer and cuts the cravings in half (lets be honest, we all still crave stuff). It is a versatile, cereal grain with an almost nutlike flavor, and once cooked, its almost like eating an al dente pasta. So besides soup, what else do I want to eat barley to, and also what are my favorite flavor combos to add to it? Because its generally a bland base, it can take on any flavor without it being over powering. I came across a recipe for sweet potato cakes with barley, and felt that I did not want the “sweet” characteristic to this dish, what I actually wanted was to use what i had in the fridge, and take it from there. So I found some peas, mushrooms, and potatoes. I also have loads of thyme (for some strange reason) and fresh oregano, parsley and Parmesan. Ok, mashup begins (excuse the pun).

Pearled Barley, Pea and Mushroom Cakes

  • Servings: 4 cakes
  • Difficulty: easy peasy
  • Print
 

Ingredients 

2 Small Potatoes – steamed, and cooled (leave the skins on them)

2 handfuls of Portabellini mushrooms – remove stalks and chopped (keep the stalks aside for later)

1 cup of Portabellini mushrooms – chopped 

1 garlic clove, minced 

1 teaspoon of fresh thyme, chopped and halved (I LOVE THYME WITH MUSHROOMS)

1 cup of cooked barley 

1/2 cup of peas 

1 tablespoon of chopped parsley 

2 kale leaves, stalks removed and chopped finely 

Parmesan 

Olive oil 

Himalayan Salt and black Pepper to season 

Method 

Soak barley for at least 1 hour in cold water Preheat oven to 180C Steam your potatoes, until soft and set aside to cool, once cooled, cut up into chunks. 

Cook the barley and peas in a small pot of water (don’t add any salt to it, the water cooks away and you might land up with really salty barley and peas)

Processed with VSCOcam with c6 preset

Drain the barley and peas, if needed, and return to the pot to start the “drying” process. You will notice that the barley will become sticky, remove from heat and add to the potatoes. 

In a pan, add a good glug of olive oil and start frying your mushrooms, once they are slightly soft, add the thyme and garlic and keep tossing the pan.

Processed with VSCOcam with c1 preset

Let the mushrooms cook until they are soft and spongy and have absorbed all the gorgeous flavors of thyme and garlic, and season them slightly (bear in mind you will season the entire dish before you start to shape the cakes). 

When the mushrooms are ready, give them a rough chop, and add them to the other ingredients.

Processed with VSCOcam with c6 preset

Add the parsley and kale. All the ingredients are cooked, give the mix a taste and add more seasoning if needed, shape into 4 big cakes or loads of smaller ones. 

Heat a small amount of olive oil in a shallow pan, and seal the cakes on either side before popping them into the oven to heat. When the cakes are in the oven, roughly chop the mushroom stalks, fry it off with the cup of chopped portabellinis, the same way as you did the mushrooms for the cakes, adding the extra thyme and season well.

To serve 

Plate each cake, topped with the warm mushrooms, sprinkle with loads of Parmesan and serve with fresh micro herbs. You can also use these as a burger night patty, topped with onion marmalade and melted provolone.

These are so good, the will become a staple and once you get the hang of all the prep work, it becomes a breeze to make!

Processed with VSCOcam with c6 preset

A modern way 

A modern way 

Without being consciously aware of it, my blog seems to have a lot of vegetarian recipes!! 

I cook a lot of vegetarian dishes, because, as mentioned before, MY vegetarian is my boss, and yes, I call her MY vegetarian. As a chef, it’s almost a preprogrammed notion to “hate” vegetarians, or anyone that needs to alter our menus, but I’ve come to love cooking and experimenting with vegetarian food. 

We demand so much when it comes to our food, and everyday the demand seems to get bigger. Free range, organic, farm fresh, healthy, local, cheap and good for the planet! Gone are the days of overindulgence, we hardly use cream or cheese, and processed products are a thing of the past. We are trying to be a bit more aware of what we put into our system, and maintain a low carbon footprint. The importance of starting at the home base is also something that I continuously preach to people. Cook, cook and cook. Yes, I know, time, life, work, gym….but just take the time to cook. 

In steps Anna Jones. 

www.instagram.com/we_are_food

Her cookbook “A modern way to eat” has over 200 recipes – all based on vegetarianism. It’s a modern day take on all things amazing. She incorporates fresh, seasonal produce, into SUPER quick and inexpensive recipes. She’s worked for Jamie Oliver and has extensive experience as a chef, she now works as a stylist and food writer for newspapers, magazines, chefs, and a host of food companies. 

“A simply brilliant book – modern, clever, beautiful, and full of delicious recipes” 
Jamie Oliver 

Her book, breaks it down and takes your back to the “root” of everything, it’s cleverly laid out and reads beautifully, with loads of tips and special hacks, and list upon list of varieties of her favorites.  

In South Africa, we might not have all the ingredients that are readily available in London, but a lot of what she uses can be found in good health stores and also at fruit and vegetable suppliers.

“These recipes not only work, they are mind-blowingly delicious. So if you need more from your food, meals that are good for you, tasty, beautiful, and unapologetically meat-free, Anna’s recipes are affirming win win win!” 
Tom Herbert 

It is really an amazing book, not just for vegetarians, but for any one trying to maintain a healthier and more balanced lifestyle. Also, it gives you loads of ideas for sides and interesting alternatives to what you might already be serving! 

  
❤️🍴

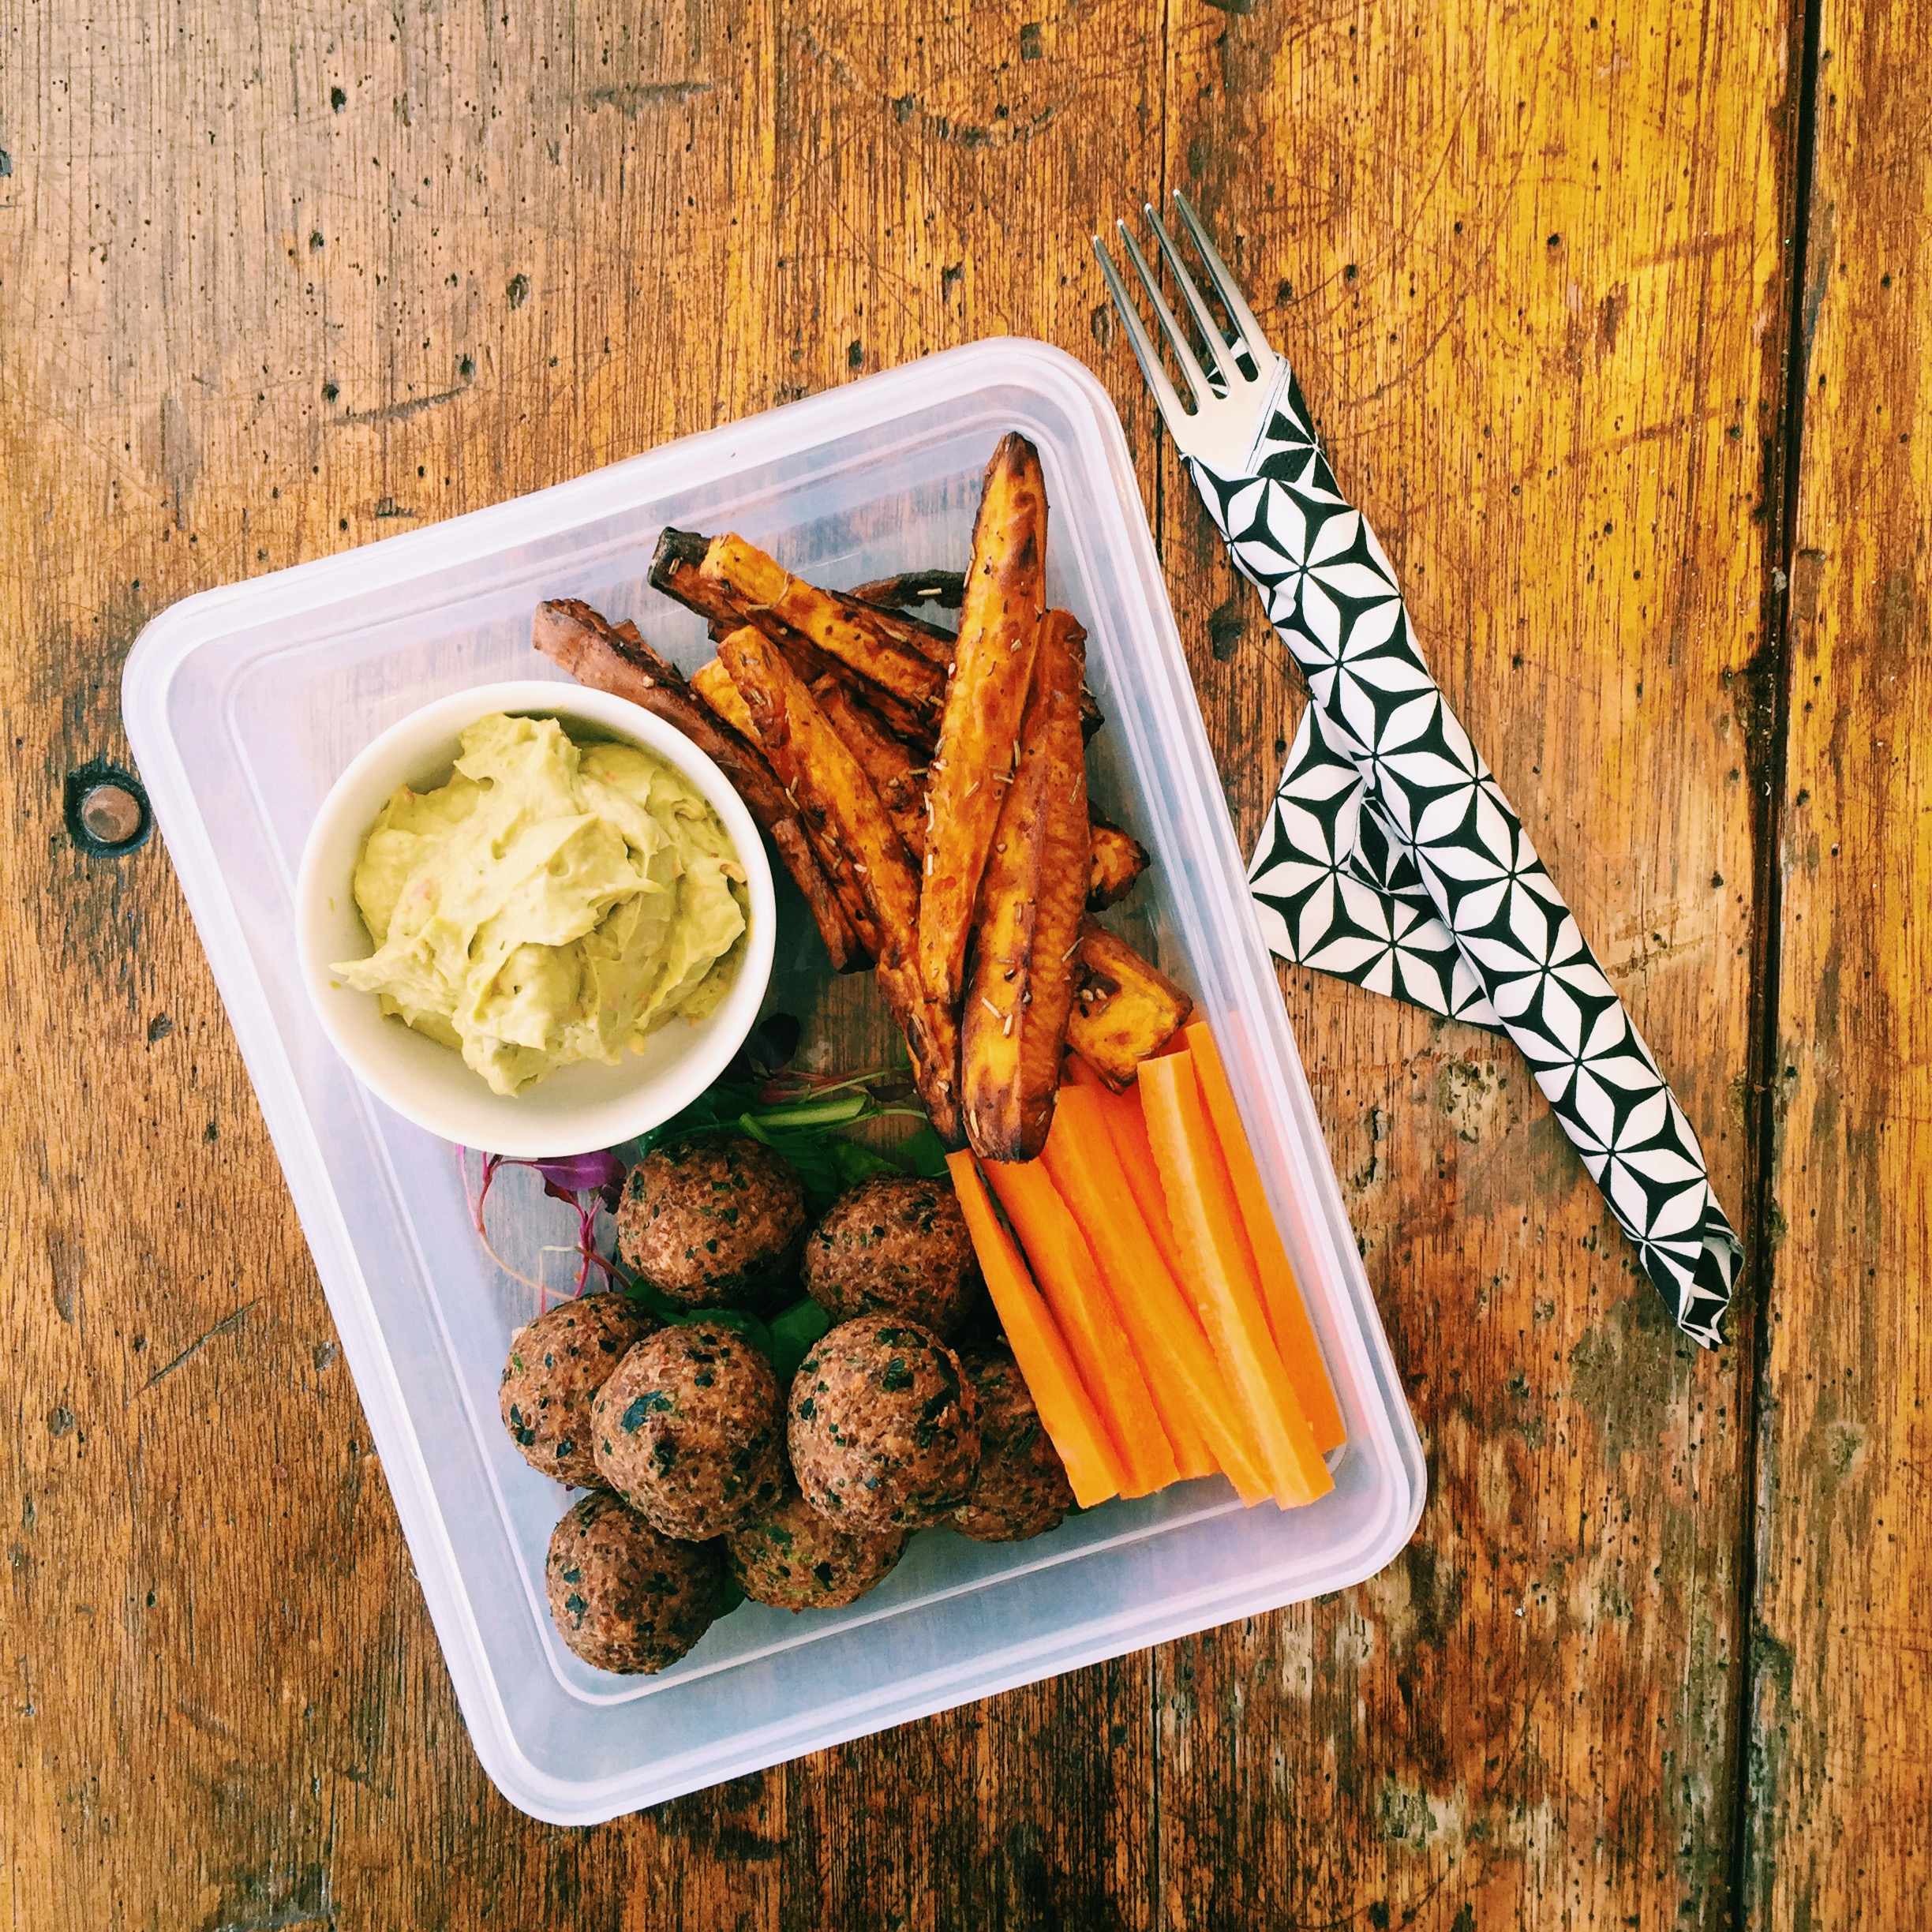
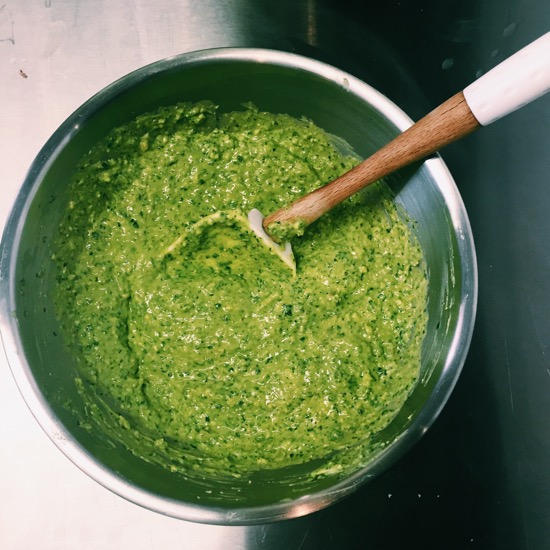
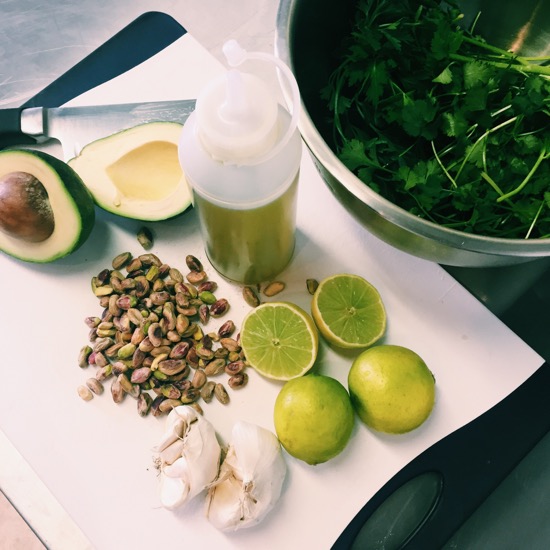
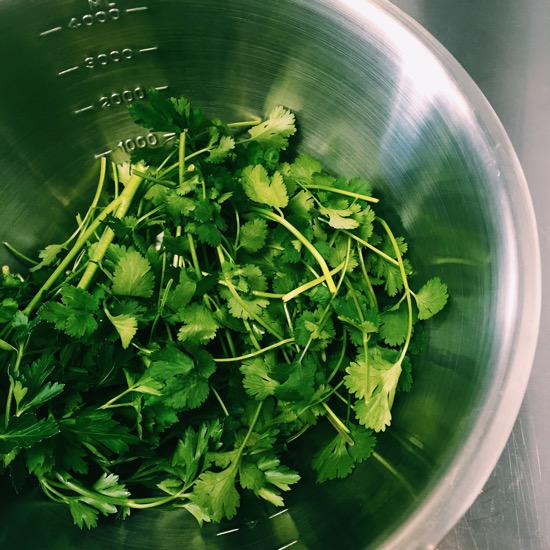
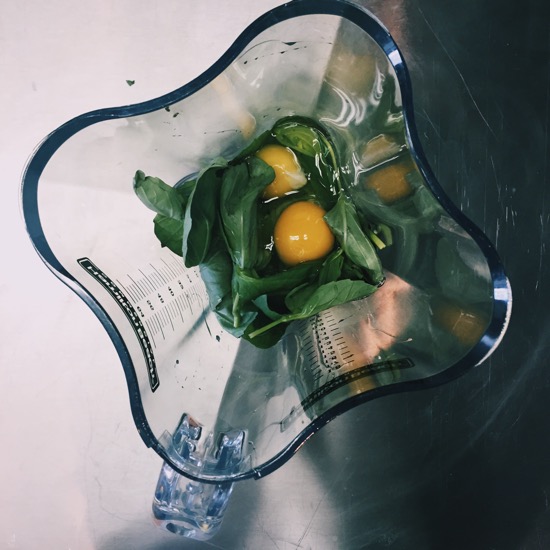
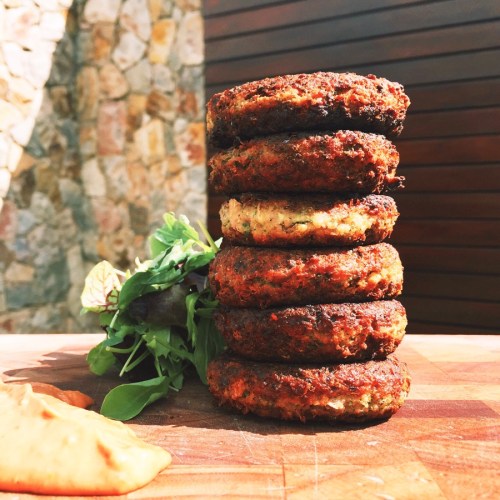
Pictured : Full of green fritters (made as a frittata), Charred corn, scrunched kale and sweet potato salad with a cashew, coriander and lime dressing. 


Watercress, leek and potato Soup. 

Watercress, leek and potato Soup. 


Mmmmmmmmmmm….it’s winter! This must be one of my favorite flavor combinations as far as soup goes! It’s creamy, filling and so tasty. The watercress also gives it a peppery tang. 

It’s a one pot wonder and in under an hour, you have a really tasty dish!

Watercress, leek and potato soup

  • Servings: 4-6
  • Difficulty: easy peasy
  • Print

Ingredients 

50g of butter

100g of watercress

800g of washed and cut leeks

6 medium potatoes (about 1kg) peeled and cut into discs

2L of good quality vegetable stock
Salt and pepper

Method

In a pot, add the butter and leave to melt, wait until it starts to foam, add your leeks and watercress. Sauté slightly.

Now add your potatoes and give it a big stir. Allow it to sauté and keep stirring it to avoid it sticking to the base of the pot.

Add your stock and bring it up to the boil.

I then turn it down to a simmer, and in about 30 minutes your potatoes will be soft enough to blend the entire mix.

Add to a blender in batches and blend until smooth. I season with pink Himalayan salt and fresh black pepper.

A little tip to keep soups interesting is adding a pesto drizzle instead of cream when you serve it.

I made a quick sundried tomato and pea pesto to serve with this soup.

The base for pesto is always the same

  • Olive oil 
  • Parmesan 
  • Pine nuts (or blanched almonds) 
  • Garlic
  • A herb of choice, and 
  • Seasoning 

I find that you don’t need to use herbs, as pulses, like peas and edamame work really well in place of them. Sundried tomatoes take on an almost “meaty” texture, so it tricks your mind into thinking that the soup might be meat based!

Bon appetite ❤️🍴

Spinach Wraps 

Spinach Wraps 

Who doesn’t love a good wrap. Either filled, or toasted for a dip, or even topped with cheese in the oven? 

I’ve tried so many of these recipes, and this is by far the best one. I found others to have to much spinach, some didn’t have enough flour, others were really tacky and didn’t seem to actually want to hold their shapes….get what I mean. Annnnnnyyyyyyyyyyyway!!!!!!

This recipe takes some time, but it’s worth it, the wraps are light, so nutritious and so yummy!

Spinach Wraps

  • Servings: 8 wraps
  • Difficulty: Relatively easy
  • Print

Ingredients 

2 cups of gluten free flour

1 cup of whole wheat flour

2 tsp baking powder

1 heaped teaspoon of salt

1 cup of blached baby spinach (that you have ringed out competely in a clean dish cloth, to get rid of all the excess water)

5 TBSP of coconut oil

2/3 cup of water

Combine the flour, baking powder, salt and spinach on a food processor. Pulse thoroughly to finely chop the spinach.

Add your coconut oil, and pulse the mixture until it’s resembles bread crumbs. With the processor running, add the water in a slow stream, until it starts to combine.
I picked up that you don’t need more water, the dough is stunningly moist, and if you take some into your hand, you will notice that it forms a ball easily.


Transfer onto a floured surface and knead for about 2 minutes.

Divide into eight equal pieces.


Cut and then shape into balls.

Cover with a clean dishcloth and leave to rest for 10 minutes.

Heat your pan.

Working with one ball at a time, while keeping the others covered, roll them out into circles, about 30 centimeters in diameter,


Carefully transfer the rolled wrap to your heated skillet, and cook each side for about 10-20 seconds, do not over cook as the wraps will then become stiff.

Immediately transfer the cooked wraps to a plate and cover with a damp kitchen towel. Repeat with the remaining dough balls. Lowering the heat as to prevent burning.

Just stack each cooked wrap onto the previous one. This will help keep them soft.

You can store them in the fridge, wrapped in plastic, but they generally won’t last that long.

The best is to have all your ingredients toll them ready and serve as they come out of the skillet, let everyone fill their own wraps as the like. It becomes a fun filled dinner or lunch!

❤️🍴


Leaning tower of patties 

Leaning tower of patties 

Aaaaaaaahhh man. I’ve been on a bit of a “I need to leave my technogical devices alone” break. But in saying that, I missed my little blog. Anyway! Back to business. 

These are awesome, yummy, taste amazing and are so filling that one with all the trimmings was enough for me!

The recipe is quick and easy and will work great for vegetarians, meat free Monday situations or just as a side to a meat dish, because we all love creative side dishes!!!!! Also, high in protein and low in carbs, they kick ass for part of a training/eating plan.

Portabella Mushroom Patties

  • Servings: 6-8 100g patties
  • Print

Ingredients 

2 cups of portabella mushrooms (just heads, chopped)

2 cups of cooked cannellini beans or cooked black beans

1 cup of minced broccoli

60g of chopped red onion

3 XL eggs beaten

1 cup of gluten free bread crumbs or Panko crumbs

2 TBSP of minched garlic

1 tsp of salt

1 tsp of pepper

3/4 cup of grated Parmesan (vegetarian friendly)

Method 

Add all ingredients into a big bowl.

Mix!

Simple.

Set aside while you heat 2 TBSP olive oil in a pan. Shape the mix in your hands (I used a half cup measure for each pattie) and gently place into the heated oil. The patties crisp up so deliciously that eating them straight from the pan needs to be put on hold.

I served mine with a sundried tomato aioli and a micro green and cucumber salad. But you can stretch your imagination and serve them anyway you like.

The mushrooms give this recipe a “meaty” texture and the beans make it ridiculously creamy and soft inside while its golden and crispy on the outside!

So yummmmmmmm!

❤️🍴