Bananarama! 

Bananarama! 

There’s no real write up about this recipe. I had ripe bananas in the fruit bowl that I needed to use…I’m also a firm believer in the power of chia seeds, and I love walnuts…presto, a recipe was born. 

  
Banana loaf, for me, makes me reminisce about moments spent, on a Sunday, in my grandmothers kitchen, where she made the most amazing banana loaf and muffins, adding dates, Brandy and obviously loads of love, to her recipes. They were moist, delicious and lathered in butter, it was moments of pure bliss. Alas, I was never able to get the recipe out of her, and I try my best to recreate it every now and again. (Failing, but still resulting with yummy bakes) 


Banana, Chia and Walnut Loaf

  • Servings: 1 large loaf
  • Print
 

Ingredients 

1 1/2 cups of flour (GF or ordinary) 

2 tsps of baking powder 

1/4 tsp of salt 

1 large egg 

2 TBSPS of soft butter 

1/2 cup of brown sugar 
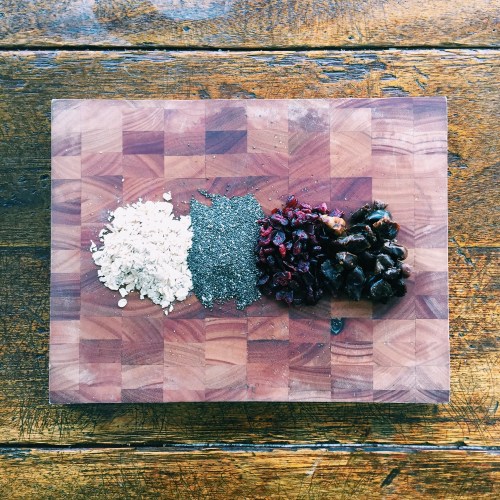
1/3 cup of chia 

1/2 cup of walnuts 

3 large bananas 

1/2 cup of milk or almond milk 

1 TBSP of cinnamon

Method  

  • Set your oven to 180C and grease a large loaf tin 
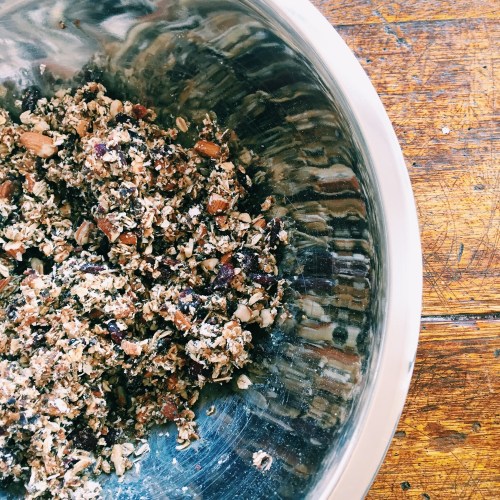
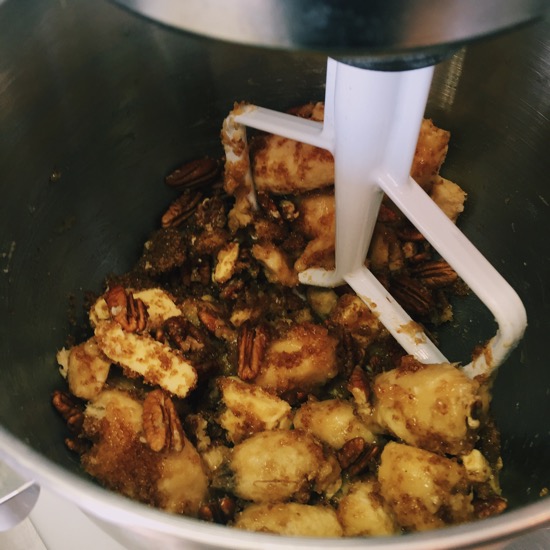
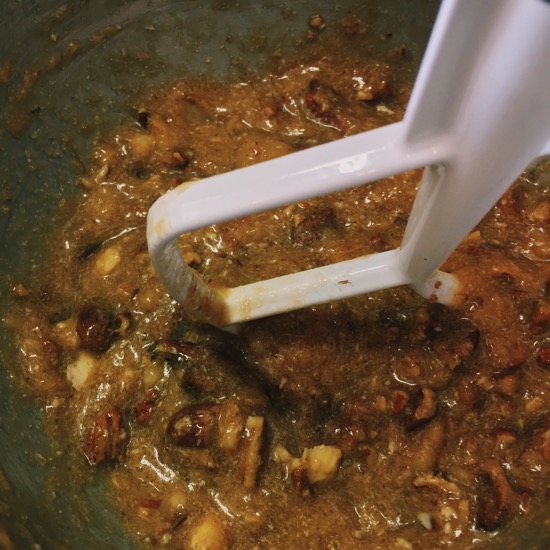
  • In a mixing bowl, add the egg, butter, sugar, milk, nuts and 2 bananas. With a paddle attachment, mix these together on a medium speed. 
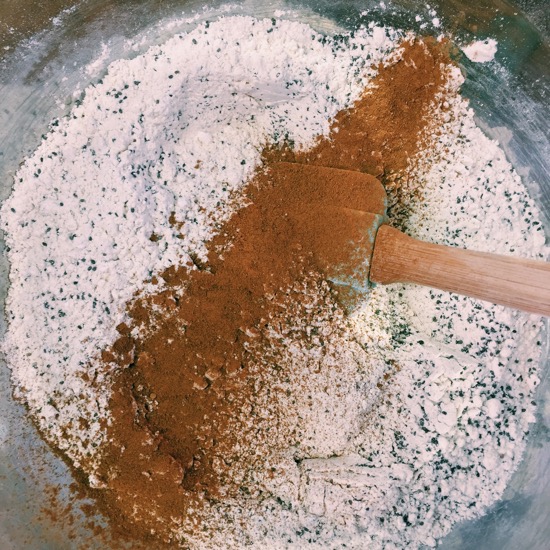
  • In a seperate bowl, mix you flour, baking powder, salt, cinnamon and chia. 
  • Once your wet mix is done, start adding the flour mix bit by bit. Keep adding until all the flour mix is done, and give it a quick blast on high, just to make sure all the mixture is properly incorporated. 
  • Place into your greased loaf tin, and top with the remaining banana, cut in half. 
  • Bake for 45-60 minutes, depending on your oven speed. 
  • I drizzled warmed honey on the top of the loaf as soon as I take it out of the oven. 


Cauliflower falafels

Cauliflower falafels

Ok guys. You know I love using cauliflower, in as much as I can. From sushi bowls, to egg fried “rice” to pizza, to fritters.

I did this recipe the other day, as I needed to make a “packed” lunch for my vegetarian, as she was on the road, and only after did I then have to figure out what I actually put in them, but don’t worry, I remembered, tried the recipe again, and all is well in the world of Food by Jill. 🙂

Falafels, as you might know, are deep fried balls that are made from chickpeas or fava beans – or even both, its a Middle Eastern favorite, served with fresh pita breads loads of hummus or pickled vegetables – and it’s a huge part of the street food culture in this countries. Rich in protein, it’s a brilliant snack option for vegetarians, or even kids lunchboxes.

Processed with VSCOcam with c6 preset

Processed with VSCOcam with c1 preset

Processed with VSCOcam with c1 preset

Processed with VSCOcam with c6 preset

Processed with VSCOcam with c1 preset

Cauliflower Falafels

  • Servings: 4
  • Difficulty: Easy peasy
  • Print

1/2 head of Cauliflower

1 Handful of coriander

1 Handful of kale (stalks removed)

2 eggs

1 tin of chickpeas

2 teaspoons of baking powder

1/2 cup of brown rice flour

Seasonings like – ground cumin, chili, salt and pepper, paprika

Depending on your taste – go wild!

Process all of these ingredients in a food processor, until fairly smooth. Shape into little balls and deep fry until golden in coconut oil, on a medium heat.

I served these with thick cut roasted sweet potato chips, that I roasted with loads of fresh herbs, and also a pea “guacamole” –  which was 1 cup of blanched peas, to 1 large avocado – blend the two and season with salt and pepper, and the juice of 2 limes! Rich in protein and so yummy!

Butterfinger licking goodness

Butterfinger licking goodness

How good do these look? 

They are ridiculously rich and decadent and sweet and yummy! Bonus….they are good for you!!! Boom! 

Ingredients 

Base: 

1/2 cup of walnuts 

1/2 cup of cashews 

1/2 cup of dates 

Pinch of salt 

3 TBSP of psyllium husk 

Choc topping: 

3/4 cup of coconut oil melted 

1/2 cup of honey or rice syrup 

1 cup of raw cacao 

1/4 tsp vanilla paste 

2 silicon muffin pans 

Ready? 

Mix the nut and dates in a bowl, add half to a food processor and process. Add the remaining mix, and process until all the dates are broken down and you have a breadcrumb like texture. 

Transfer to a bowl, mix through the psyllium husk. 

Shape the base mix into your muffin trays, I find about one heaped tablespoon in each gives you the right thickness. 


Set aside 

In a blender, add your topping ingredients. Blend on high until the texture becomes smooth and resembles melted chocolate. 

Now work fast, spoon the cacao mix over your already prepared bases, a tablespoon in each is over enough. 

Pop the trays into the fridge and leave to set for at least 2 hours. 

Gently remove them from the moulds and place them between wax paper into a airtight container and store them in the fridge! 

Delicious 

Recipe adapted from @therawtarian

❤️🍴

Chocolatey goodness 

Chocolatey goodness 

Edit

I have been following Laura-Jane, on Twitter for a long time. I also, obviously follow her on Instagram and pop in on her website www.therawtarian.com weekly to see what’s new and what tickles my tastebuds. 

As I have said before, I’m not on any level completely raw, but I find that the “snacks/sweets/desserts” on her site are easy and they taste amazing. It also really helps to rather have two raw cookies than eat two shortbreads, especially if you are trying to keep the kilograms down and are just open to have a healthier lifestyle. 

Her recipe for “Best Raw Chocolate Cookies” are RIDCULOUSLY easy! Like sooooooooo easy!!

Ingredients 

1 cup of almonds 

1 1/2 cups of cashew nuts 

1 cup of dates 

2 tablespoons of agave nectar (I used rice syrup) 

1 TBSP of coconut oil 

1 TBSP of vanilla extract (I used 1 teaspoon of vanilla paste) 

1/2 cup of cacao powder 

1 pinch of sea salt 

Process the almonds and cashews in a food processor until they almost resemble flour. Add dates, agave nectar, coconut oil, vanilla and cacao. 

Blend until fully incorporated and sticky. 

Shape into cookies and keep covered in the fridge for up to 5 days. 

❤️🍴

Cheeeeeeeewy amazingness! 

Cheeeeeeeewy amazingness! 


These are AWESOME! 

I also use the word awesome a lot! 😉 

They are addictive, chewy, yummy, gooooooood for you…obviously! 

Ingredients (makes about 30 bite size cookies) 

1 cup of gluten free flour or buckwheat flour 

1 cup of oats (gluten free if you want) 

1 medium apple, peeled and cored 

2 medium sized ripe bananas 

1/2 cup of dates (POWERFOOD) – chopped 

1 tsp of cinnamon powder 

Method 

Set oven to 175C 

In a food processor, add the dates, apple and bananas – blend until all smooth and thick.  

In a bowl, mix the oats, flour and cinnamon. 

Ok. Now mix the wet and dry…the “dough” is sticky, but keep your hands moist when shaping them and you’ll be ok! (Promise!) 

Shape the cookies and line them up onto a prepared baking tray. 

Bake for 30-45 minutes or until golden brown. 

Allow to cool (if it lasts that long)  BOOM! 

❤️🍴

Balls of energy! 

Balls of energy! 


Everyone needs a boost now and then. We all on a major mission called LIFE. Most days it wins at kicking our backsides, other days we rule the race. But any bit of help is welcomed and if they are in the form of small delicious bite size pleasures, then why deprive yourself? 

Ingredients 

2 cup of chopped dates 

1/2 cup of honey 

1 TBSP of Chia seeds 

1 TBSP of flax seeds 

A pinch of salt 

1 1/2 cup of gluten free oats 

1 cup of crushed almonds 

1 cup of cranberries 

1/3 cup of raw cacao nibs

Combine the dates, honey, chia, flax and salt in a food processor, it takes a bit of time to mix up, but leave it running and soon it blends to a delicious gooey paste.

Mix the oats, nuts and cranberries with the cacao in a seperate bowl. 

Add the wet to the dry. 


Roll up your sleeves and mix. It’s becomes messy, but what helps is that you can pick your fingers after. BONUS. 

Ok….now leave to “settle” for about 15 minutes. 


Keep a little bowl of water on hand to dampen your palms, it helps when shaping the balls. 

And shape! 

Ok. 

So, you can leave them raw, or you can bake them. I find if you bake them, you can keep them in an airtight container for 2 weeks, if you keep them raw, you have to keep them refrigerated, but in both cases they last that long (if you don’t eat them before). 

If you bake, set oven to 180C, bake for 10 minutes, leave to cool before you store them! 


❤️🍴